How to Choose the Right Concrete Finish for Your Outdoor Patio
How to Choose the Right Concrete Finish for Your Outdoor Patio
Reading time: 12 minutes
You’ve finally decided to build that outdoor patio you’ve been dreaming about. The contractor quotes are in, the budget is set, and then it hits you — what kind of concrete finish should you actually choose? Suddenly, you’re drowning in terms like “broom finish,” “exposed aggregate,” “stamped concrete,” and “polished overlay,” and you’re not entirely sure which one is right for your backyard, your climate, or your lifestyle.
Here’s the straight talk: choosing the wrong concrete finish isn’t just an aesthetic mistake — it can cost you thousands in repairs, create serious slip hazards, and leave you with a patio that looks tired within two years. But choosing the right one? That transforms an ordinary slab into an outdoor living space that adds real value to your home and holds up beautifully for decades.
This guide cuts through the noise and gives you a practical, experience-backed roadmap for making the smartest decision for your specific situation.
Table of Contents
- Why the Right Finish Matters More Than You Think
- The Main Types of Concrete Finishes Explained
- Side-by-Side Comparison: Which Finish Wins Where?
- Key Factors to Consider Before You Decide
- 3 Common Challenges — and How to Overcome Them
- Popularity & Performance: A Visual Snapshot
- Frequently Asked Questions
- Your Patio Decision Playbook: Next Steps
Why the Right Finish Matters More Than You Think
In 2026, outdoor living spaces have become one of the most valuable investments a homeowner can make. According to a National Association of Realtors report published in early 2026, well-designed patios return an average of 68–78% of their installation cost in home resale value — a figure that’s risen steadily since 2023 as remote work culture has permanently shifted how Americans use their outdoor spaces.
But here’s what most patio guides won’t tell you: the finish on your concrete is often what separates a patio that depreciates rapidly from one that adds lasting curb appeal and functional value. The finish affects:
- Safety: Slip resistance in wet or icy conditions
- Durability: Resistance to freeze-thaw cycles, UV damage, and heavy foot traffic
- Maintenance: How often you’ll need to seal, clean, or repair the surface
- Aesthetics: How the patio integrates with your home’s architecture and landscaping
- Cost over time: Some cheaper finishes require expensive upkeep within 3–5 years
Think of it this way: the concrete itself is the bones, but the finish is the skin. And just like skin, it’s the first thing everyone sees and the first thing that shows wear.
The Main Types of Concrete Finishes Explained
Let’s break down the most popular options available to homeowners in 2026, with honest assessments of where each one shines — and where it struggles.
1. Broom Finish (Brushed Concrete)
The broom finish is the classic workhorse of patio concrete. Once the concrete is poured and leveled, a stiff brush or broom is dragged across the surface while it’s still wet, creating fine parallel ridges. Simple, reliable, and time-tested.
Best for: Homeowners on a budget, high-traffic areas, pool surrounds, and climates with frequent rain or ice.
Cost range (2026 average): $6–$10 per square foot installed.
Drawback: It’s the least visually exciting option. If you’re hosting dinner parties on your patio, a broom finish might feel a little institutional.
2. Exposed Aggregate Finish
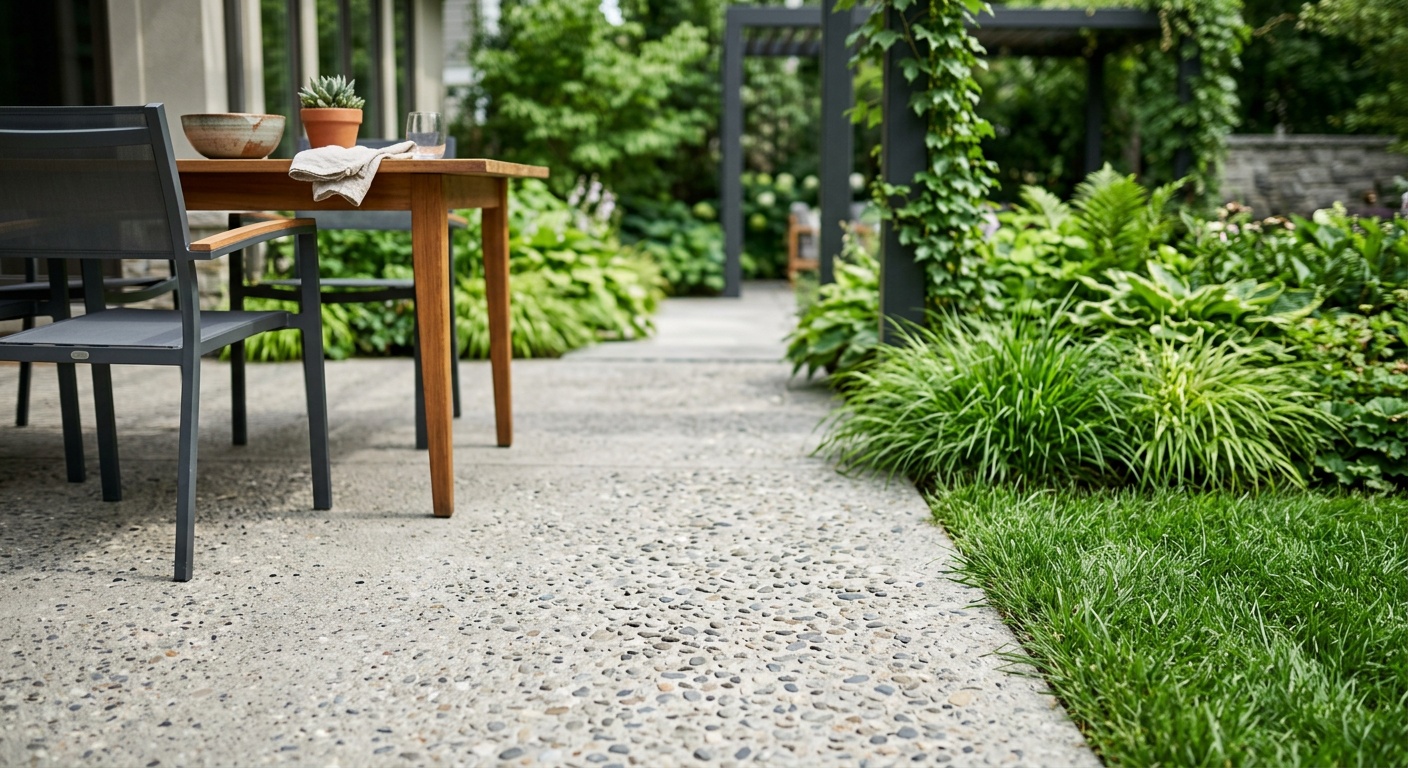
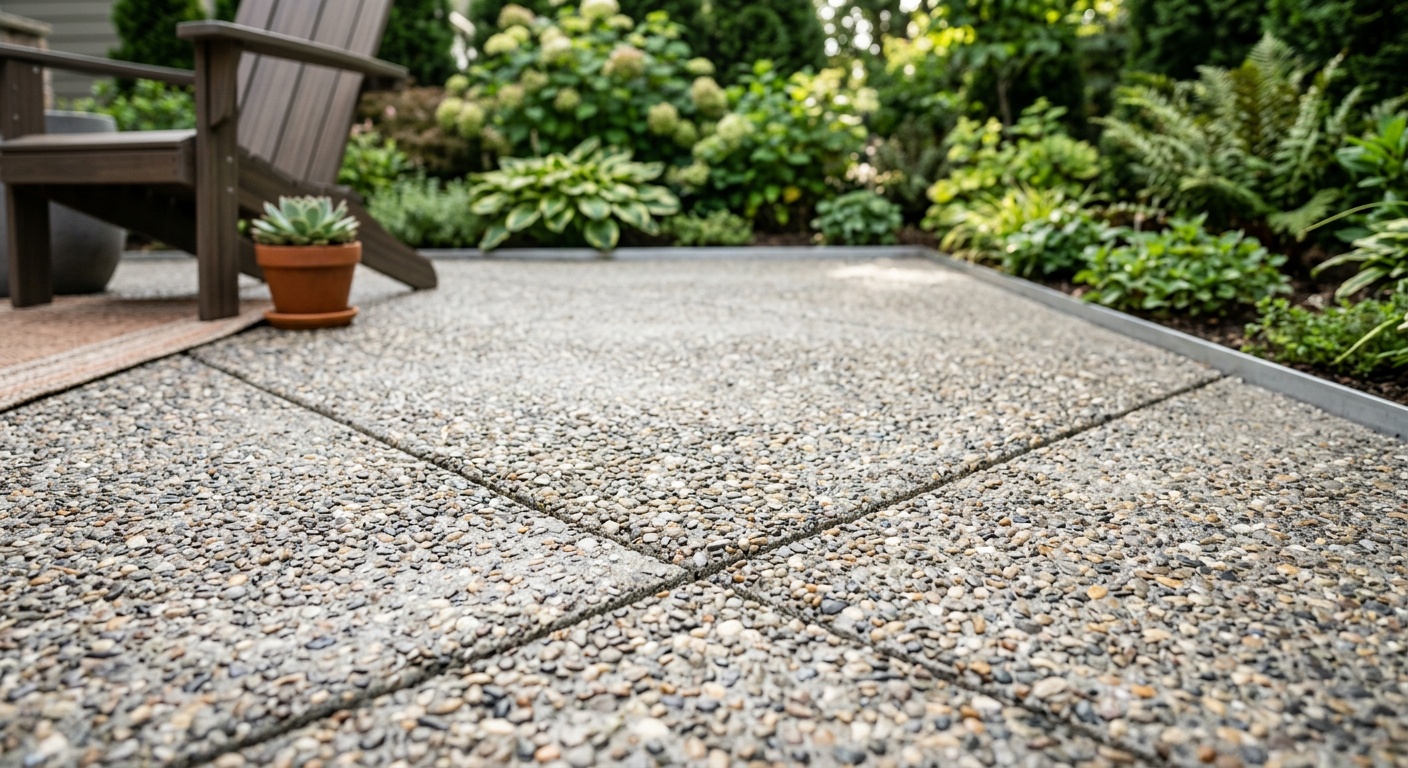
This finish involves washing away the top layer of cement paste before it fully cures, revealing the stones, pebbles, or shells embedded in the concrete mix. The result is a naturally textured, visually rich surface that looks almost organic.
Best for: Homeowners wanting visual interest without the maintenance commitment of stamped concrete; excellent in wet climates because the aggregate provides natural grip.
Cost range (2026 average): $8–$18 per square foot installed.
Drawback: The rough texture can be hard on bare feet and difficult to clean if fine debris settles between the stones.
3. Stamped Concrete
Stamped concrete uses patterned rubber molds pressed into freshly poured concrete — combined with integral coloring and surface stains — to mimic the appearance of stone, brick, slate, or wood. In 2026, stamped concrete technology has advanced considerably, with micro-texture stamps that create near-photorealistic replication of natural materials.
Best for: Homeowners who want the look of high-end materials (flagstone, travertine, cobblestone) at a lower price point; also great for cohesive outdoor design schemes.
Cost range (2026 average): $12–$25 per square foot installed.
Drawback: Requires resealing every 2–3 years to maintain color vibrancy and surface integrity. If it cracks, matching the pattern during repairs can be tricky.
4. Polished or Burnished Concrete
Achieved through progressive grinding with diamond-tipped tools, polished concrete creates a smooth, glossy surface. This is more commonly seen in covered outdoor rooms, screened patios, or lanais where direct weather exposure is limited.
Best for: Covered patios, modern or minimalist home designs, spaces that double as indoor-outdoor entertaining areas.
Cost range (2026 average): $15–$30 per square foot installed.
Drawback: Very slippery when wet. Without anti-slip additives in the sealer, polished concrete is genuinely dangerous on an exposed outdoor surface.
5. Salt Finish
Rock salt is pressed into freshly placed concrete and then washed away after hardening, leaving shallow pits and a lightly pocked texture. It’s visually subtle but provides a pleasant, spa-like surface that’s gentle underfoot.
Best for: Pool decks, resort-style patios, warm climates. Not recommended in freeze-thaw climates — the pitting can trap water that expands when frozen.
Cost range (2026 average): $7–$12 per square foot installed.
6. Stenciled or Overlay Finishes
Overlays involve applying a thin layer of polymer-modified concrete over an existing slab, then stenciling, stamping, or coloring it. This is an increasingly popular choice in 2026 for homeowners renovating an existing patio without full demolition.
Best for: Renovation projects, budget-conscious homeowners who want a visual upgrade without tearing out the old slab.
Cost range (2026 average): $5–$14 per square foot for overlay systems.
Drawback: The bond between the overlay and the existing concrete is only as good as the surface preparation. A poorly prepared base will cause delamination within a few years.
Side-by-Side Comparison: Which Finish Wins Where?
| Finish Type | Slip Resistance | Durability (1–10) | Maintenance Level | Visual Appeal | Avg. Cost/sq ft (2026) |
|---|---|---|---|---|---|
| Broom Finish | Excellent | 9 | Low | Basic | $6–$10 |
| Exposed Aggregate | Very Good | 8 | Low–Medium | Good | $8–$18 |
| Stamped Concrete | Moderate | 7 | Medium–High | Excellent | $12–$25 |
| Polished Concrete | Poor (wet) | 8 | Medium | Excellent | $15–$30 |
| Overlay/Stencil | Good | 6 | Medium | Very Good | $5–$14 |
Key Factors to Consider Before You Decide
Before you lock in your choice, run through these critical decision filters. Think of them as your personal checklist for navigating a complex but very solvable problem.
Your Climate Is Non-Negotiable
This is the single most important factor that many homeowners overlook because they’re too focused on aesthetics. In freeze-thaw climates — think the Midwest, New England, or the Pacific Northwest — you need a finish that won’t trap water in surface pores. Water expands by about 9% when it freezes, and that expansion is what causes surface spalling and cracking.
In these climates, broom finish and exposed aggregate are consistently the most resilient choices. They allow surface water to drain quickly and don’t rely on sealers to the same extent. Stamped concrete in freeze-thaw zones is workable but demands diligent resealing every 18–24 months — and if you miss a cycle, water infiltration can damage the color layer and the surface integrity beneath.
In warm, dry climates like Arizona, Southern California, or Florida, you have much more freedom. UV resistance becomes the primary concern, meaning you’ll want a sealer with strong UV-blocking properties regardless of finish type. Salt finishes and polished overlays thrive in these environments.
How You Actually Use Your Patio
Quick scenario: imagine two households — one with three kids under ten and a dog, another with empty-nesters who host elegant dinner parties twice a month. These households should not choose the same finish.
The family with kids and pets needs a surface that’s forgiving underfoot, easy to hose down, and slip-resistant when wet. A broom finish or exposed aggregate with rounded pebbles serves them well. The fine texture is gentle on tumbling kids, and a quick power wash removes muddy paw prints effortlessly.
The dinner-party household might prioritize the visual richness of stamped concrete with a slate or travertine pattern, perhaps with integral coloring in warm terracotta tones. The moderate maintenance commitment is acceptable because they’re invested in the aesthetic return.
Your Long-Term Budget (Not Just Upfront Cost)
Here’s a perspective that often surprises homeowners: the cheapest finish upfront is not always the least expensive over a 10-year horizon. Consider this realistic comparison for a 400 sq ft patio:
- Broom finish at $8/sq ft = $3,200 installed. Minimal sealing required. 10-year maintenance cost: approximately $300–$500.
- Stamped concrete at $18/sq ft = $7,200 installed. Resealing every 2–3 years at $200–$400 per application. 10-year maintenance cost: approximately $800–$1,500.
- Overlay on existing slab at $10/sq ft = $4,000 installed. If the bond fails due to poor prep, partial resurfacing in year 5 could cost $1,500–$2,000.
Total cost of ownership matters. Get your contractor to give you a realistic maintenance schedule — and be skeptical if they say “this finish is maintenance-free.” No exterior concrete finish is truly maintenance-free in 2026 or any other year.
Your Home’s Architectural Style
Concrete finishes don’t exist in a vacuum — they’re part of a larger visual story. A modern farmhouse with white board-and-batten siding looks stunning with a brushed concrete patio in a light gray tone, perhaps with a simple geometric scoring pattern. A Mediterranean revival home calls for warm ochre or terracotta stamped concrete with a Spanish tile pattern. A contemporary minimalist home might favor a smooth polished overlay in a covered outdoor room.
Pro tip: Pull a color from your home’s exterior — a brick tone, a trim color, a stone accent — and use it as a reference point when choosing concrete colorants or stains. This creates a visual through-line that makes your patio feel intentional rather than incidental.
3 Common Challenges — and How to Overcome Them
Challenge 1: The Finish Looks Nothing Like the Sample
This is perhaps the most common source of homeowner disappointment in concrete projects. You approved a beautiful 6-inch sample chip of stamped concrete in “autumn sunset,” and the finished 400 sq ft patio looks noticeably different — lighter, less vibrant, or inconsistently colored.
Why it happens: Concrete color is highly sensitive to water-cement ratio, temperature during curing, and the specific batch of cement used. Larger surface areas also naturally show more color variation.
How to overcome it: Ask your contractor to create a full-scale test panel of at least 4×4 feet on site, using the same mix and conditions as the actual pour. Review it in different lighting conditions — morning, midday, and evening. Also request a sealed sample, because sealer dramatically affects the final appearance of colored concrete.
Challenge 2: Cracking Within the First Two Years
Surface cracking is often seen as a failure, but here’s the nuanced truth: concrete always cracks. The goal of proper installation is to control where it cracks and how those cracks are managed. Many homeowners discover hairline cracks appearing within 6–18 months and assume something went wrong. Sometimes it did — but often it’s a natural response to curing and thermal movement.
The real problem arises when control joints (the deliberate saw cuts or tooled grooves placed in the concrete) are spaced too far apart, too shallow, or not placed at all. In 2026, the Concrete Network recommends control joints every 8–12 feet in both directions for residential patios, placed at a depth of at least one-quarter the slab thickness.
How to overcome it: Before your pour, have an explicit conversation with your contractor about control joint placement and depth. Ask to see their plan on paper. If they wave this off as unnecessary, consider that a red flag.
Challenge 3: Slippery Surfaces After Sealing
You invested in beautiful stamped concrete, had it sealed to protect the color, and now your patio is a slip hazard after rain. This is a genuinely dangerous and frustratingly common problem.
Why it happens: Many decorative concrete sealers — particularly high-gloss acrylic and epoxy formulas — create a smooth, nearly frictionless film on the surface that becomes treacherous when wet.
How to overcome it: There are two solutions that work well in 2026. First, request that your contractor add anti-slip aggregate (aluminum oxide or fine silica sand) to the sealer before application. This creates a gritty texture that maintains grip without significantly affecting appearance. Second, choose a penetrating sealer rather than a film-forming sealer for exposed outdoor surfaces. Penetrating sealers soak into the concrete rather than sitting on top, providing moisture protection without creating a slick surface film.
Popularity & Performance: A Visual Snapshot
Based on contractor survey data compiled by the American Concrete Institute in early 2026, here’s how residential concrete finish choices break down by homeowner satisfaction rating (scale of 1–100):
Homeowner Satisfaction Score by Concrete Finish (2026 Survey)
88/100
83/100
79/100
71/100
65/100
Note: Polished concrete’s lower score reflects its common use in contexts where it’s poorly suited (uncovered outdoor slabs). In appropriate covered applications, ratings rise to 85+.
What’s telling here is that exposed aggregate leads on satisfaction — not because it’s the flashiest, but because it consistently delivers on expectations. Homeowners who choose it rarely encounter the disappointment gap that can affect stamped concrete or overlay projects when execution falls short of the sample.
Frequently Asked Questions
How long does a concrete patio finish typically last before it needs to be refinished or replaced?
The honest answer depends heavily on both the finish type and your climate. A well-installed broom finish in a moderate climate can last 25–30 years with minimal intervention — essentially indefinitely if hairline cracks are filled periodically. Stamped and colored concrete surfaces, however, require resealing every 2–3 years to maintain their color integrity and surface protection. If resealing is neglected for 5 or more years, UV damage and moisture infiltration can cause color fading and surface scaling that requires professional resurfacing. Overlay systems typically have a practical lifespan of 10–15 years before they need replacement, though a high-quality overlay properly bonded to a sound substrate can last longer. The key takeaway: factor maintenance into your timeline, not just your budget.
Can I change the finish of my existing concrete patio without completely tearing it out?
Yes, in many cases — and this is one of the most underutilized options in residential renovation. If your existing slab is structurally sound (no deep cracks, no significant heaving, no moisture intrusion from below), a concrete overlay system can be applied directly over the top. In 2026, micro-topping products allow layers as thin as 1/16 inch to be applied, giving you a completely new visual surface without the cost and waste of demolition. Staining an existing slab — using acid stains or water-based reactive stains — is another excellent option that penetrates the existing surface to create color variations. The limitation is that you can’t change the texture of an existing slab as dramatically without a full overlay, and overlays on compromised slabs will fail. Always get a professional assessment of your existing slab’s condition before committing to a renovation approach.
Is stamped concrete slippery, and is it safe for families with children or elderly members?
Stamped concrete’s slip resistance depends almost entirely on how it’s sealed. The stamping process itself creates texture and depth, but when a high-gloss film-forming sealer is applied on top, that texture becomes largely irrelevant — the sealer creates the contact surface, not the concrete beneath it. The practical solution, as noted earlier in this guide, is to either use a penetrating sealer or add anti-slip aggregate to your topcoat sealer. For households with young children or elderly members, this is non-negotiable. Request that your contractor use an aluminum oxide anti-slip additive in the sealer at a concentration of at least 4–6 ounces per gallon. This maintains a safe coefficient of friction even when the surface is wet, while the visual impact is minimal — the surface looks slightly less glossy but the stamped pattern remains fully visible and attractive.
Your Patio Decision Playbook: Next Steps
You’ve now got a genuine working knowledge of concrete finishes — not the vague “it depends” advice you’d find on a product manufacturer’s website, but the real-world framework that helps you make a confident, informed decision. Here’s your action-oriented roadmap for moving forward:
- Define your non-negotiables first. Write down your climate zone, how you’ll use the space, and your realistic 10-year maintenance commitment. These three factors should eliminate at least two or three options immediately.
- Request full-scale samples and sealer demonstrations. Never approve a decorative finish based on a small chip. Ask to see the finish sealed, in your actual outdoor lighting conditions, over a panel of at least 16 square feet.
- Verify your contractor’s control joint plan in writing. Before any pour, confirm joint spacing, depth, and placement strategy. This is how you prevent the most common and costly form of patio disappointment.
- Get anti-slip specifications in your contract. If you’re choosing a sealed decorative finish, specify the type and concentration of anti-slip additive in writing before you sign anything.
- Plan your sealing schedule before the patio is even poured. Know who will maintain your finish, at what interval, and at what approximate cost — and build that into your total project budget.
As we move deeper into 2026, the outdoor living market continues to evolve rapidly, with smart drainage systems, integrated lighting channels, and even thermochromic concrete finishes beginning to enter the residential mainstream. The choices you make today should not only serve your current lifestyle but also be compatible with the upgrades you might want to add in the next five to ten years.
Here’s the question worth sitting with: When you picture yourself on your finished patio five years from now — hosting, relaxing, watching your kids play, or simply having your morning coffee — what does that surface feel like underfoot, and what does it say about the home you’ve built? Let that vision guide your technical decisions, and you’ll rarely go wrong.
Your perfect patio finish isn’t the most expensive one, the trendiest one, or even the most durable one — it’s the one that fits your real life, your specific climate, and the home you actually have. Now you have the tools to find it.